

Manage Categories
What are Categories?
The main organizational unit of your site is the Category. Categories (and Subcategories) are the "containers" for all your items. When you log into the Site Manager you will see your list of Top Level Categories.
Each Top Level Category is set up for a certain type of content (e.g., products, testimonials, FAQs, etc.). The way the pages display on the website and the Site Manager fields that are included for the items in that category are based on the content type.
Using Categories to Organize Content
You'll use categories to organize your site content. Here is an sample of how categories might be arranged for a clothing store:
-Product Catalog
---Clothing
-----Shirts
--------Long Sleeve
--------Short Sleeve
-----Pants
--------Long
--------Short
--------Capri
---Shop By Brand
-----Gap
-----Eddie Bauer
-----Old Navy
---On Sale Now
Adding a Single Subcategory
You can add as many Subcategories as you like in the Site Manager. Subcategories, as the name implies, will show up underneath their "Parent" category on the website.
Add a Single Subcategory with the "I want to" Menu
- Click the "I want to" drop-down men to the right of the category and choose "Add a Subcategory".

- Enter information for your category on the "Add" screen. At a minimum, you will want to add the "Category Name" and "web-page-address" fields. Be sure to tab out of the web-page-address field to make sure your entry is unique. (See more on setting unique web-page-addresses)
- Click "Save Changes".
- You will be able to view your new subcategory by clicking on "View Subcategories" next to its Parent Category.
Adding a Single Subcategory with the Content Action Links
This method works if a category already has subcategories.
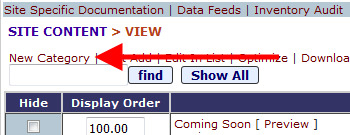
- Click the "View Subcategories" link to the right of the category where you want to add an additional category.
- Click the "New Category" link above the search field.
- Enter information for your category on the "Add" screen. At a minimum, you will want to add the "Category Name" and "web-page-address" fields. Be sure to tab out of the web-page-address field to make sure your entry is unique. (See more on setting unique web-page-addresses)
- Click "Save Changes".
- You will be able to view your new subcategory by clicking on "View Subcategories" next to its Parent Category.
Add Multiple Subcategories with Fast Add
The Fast Add feature is a way to add multiple subcategories at once. However, only a limited number of category fields will be available with Fast Add. If you plan to enter category descriptions, category images, etc., when adding your subcategories, it's best to add them one at a time.
Fast Add Subcategories with the "I want to" drop-down menu
- Click the "I want to" drop-down men to the right of the category and choose "Fast Add Subcategories".

- Enter information for your category on the "Add" screen. At a minimum, you will want to add the "Category Name" and "web-page-address" fields. Be sure to tab out of the web-page-address field to make sure your entry is unique. (See more on setting unique web-page-addresses)
- Click "Save Changes".
- You will be able to view your new subcategories by clicking on "View Subcategories" next to its Parent Category.
Fast Add Subcategories with the Content Action Links
This method works if a category already has subcategories.
- Click the "View Subcategories" link to the right of the category where you want to add an additional category.
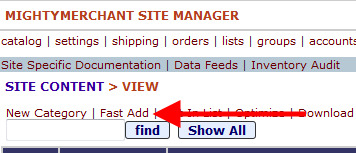
- Click the "Fast Add" link above the search field.
- Enter information for your category on the "Add" screen. At a minimum, you will want to add the "Category Name" and "web-page-address" fields. Be sure to tab out of the web-page-address field to make sure your entry is unique. (See more on setting unique web-page-addresses)
- Click "Save Changes".
- You will be able to view your new subcategories by clicking on "View Subcategories" next to its Parent Category.
Editing a Category
- Click directly on the name of the category.
- Make any changes.
- Click "Save Changes".
Adding Items to a Category
Add a Single Item with the "I want to" Menu
- Click the "I want to" drop-down men to the right of the category and choose "Add an Item".

- Enter information for your item on the "Add" screen. At a minimum, you will want to fill in the "Name" and "web-page-address" fields. Be sure to tab out of the web-page-address field to make sure your entry is unique. (See more on setting unique web-page-addresses)
- Click "Save Changes".
- You will be able to view your new item by clicking on "View Items" next to its Parent Category.
Add Multiple Items with the "I want to" Menu
- Click the "I want to" drop-down men to the right of the category and choose "Fast Add Items".

- Enter information for your item on the "Add" screen. At a minimum, you will want to fill in the "Name" and "web-page-address" fields. Be sure to tab out of the web-page-address field to make sure your entry is unique. (See more on setting unique web-page-addresses)
- Click "Save Changes".
- You will be able to view your new items by clicking on "View Items" next to its Parent Category.
Note: Not all fields may be available when using "Fast Add".
Adding a Single Item with the Content Action Links
This method works if a category already has items.
- Click the "View Items" link to the right of the category where you want to add the item.
- Click the "New Item" link above the search field.

- Enter information for your category on the "Add" screen. At a minimum, you will want to fill in the "Name" and "web-page-address" fields. Be sure to tab out of the web-page-address field to make sure your entry is unique. (See more on setting unique web-page-addresses)
- Click "Save Changes".
- You will be able to view your new item by clicking on "View Items" next to its Parent Category.
Adding Multiple Items with the Content Action Links
This method works if a category already has items.
- Click the "View Items" link to the right of the category where you want to add an additional item.
- Click the "New Item" link above the search field.

- Enter information for your category on the "Add" screen. At a minimum, you will want to fill in the "Name" and "web-page-address" fields. Be sure to tab out of the web-page-address field to make sure your entry is unique. (See more on setting unique web-page-addresses)
- Click "Save Changes".
- You will be able to view your new item by clicking on "View Items" next to its Parent Category.
Note: Not all fields may be available when using "Fast Add".
Putting Items in More Than One Category
Items in your Site Manager can be assigned to as many categories or subcategories as you wish. For example, you might want to have your products grouped with other similar types of products, as well as grouped by manufacturer.
- Open the Edit screen for the product.
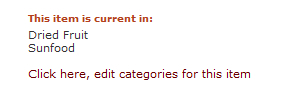
- At the right of the page, click the "Click here, edit categories for this item" link (top-right of the item edit screen). This will display a list of all your categories and subcategories.

- Check all the categories in which you wish to have the product displayed.
- Note: You will normally want to check off the lowest level subcategories, since that is where the items will be displayed on the site.
- Click "Save Changes".
Using "Categorize" to Add Items to a Category
The Categorize feature allows you to quickly add multiple existing items to a category. For example, you could create a Best Sellers category and categorize all items that your customers purchase frequently.
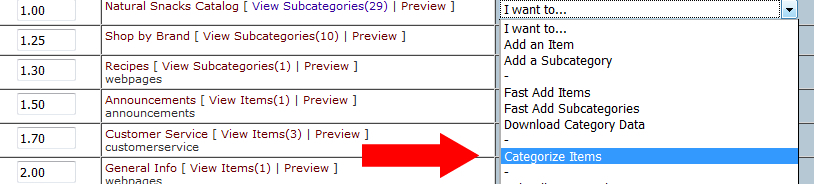
- Click the "I want to" drop-down menu to the right of the category and choose "Categorize Items". A list of the items in that section will display.
- Check off the items you want to include in your category. If there are multiple pages of items, click "Save and go to next page" to continue selecting items.
- When you are done selecting items, click "Save all Changes".
Moving Items from One Category to Another
- You can move an item from one category to another by changing its Main Category.
- If the item is included in multiple categories, you can change the change these by editing the items for the category.
Note: Unchecking the Main Category from this list does NOT remove the item from that category. To remove an item from its Main Category, you must change the Main Category field.
About the Main Category
Assigning a Main Category
- An item can be assigned to show in multiple categories, but its Main Category should be the most appropriate category for that item. For example, if you have a New Items category and a Shirts category, the Main Category for a new shirt should be Shirts, and not New Items.
- When you add an item to a category, either with the "I want to" menu or the Action Links, that category is automatically assigned to be that item's Main Category.
How the Main Category Affects Layout
- Each category in the Site Manager has a "Component Type" and "Component Layout" assigned that will affect how the category and its items are displayed on the website. An item will use the layout specified by its Main Category.
- If the layout for an item is not displaying correctly on the website, often its because there is no Main Category (or the wrong Main Category) set.
What Does List Action Do?
The List Action determines the type of content (category, subcategories, or items) that will display for a particular category.
cpage
- Displays category information such as category name, category image, and category description. Does not include links to subcategories or items.
listcats
- Displays a list of the category's main subcategories.
listitems
- Displays a list of the category's items.
smartlist (this is the default)
- Displays content based on whether or not a category contains subcategories, items, or neither.
- Smartlist displays in this order:
- If the category has subcategories (or subcategories and items at the same level), smartlist will include a list of subcategories (similar to listcats).
- If the category has items, smartlist will include a list of items (similar to listitems)
- If the category has neither subcategories nor items, smartlist will display category content (similar to cpage).
multilist
- Displays multiple subcategories along with the items in the subcategories. May or may not include a subhead for each subcategory.
Other
- Occasionally, the category list action will be set to "other", along with a url address to another page. This forces the category link to go to the alternate url address.
Duplicating Categories
Some website will be set up with the option to duplicate categories.
- Use the "I want to" drop-down menu to the right of the category you want to duplicate and choose "Duplicate Category".

- Choose from the following options on how to handle the items in the category:
- Ignore products (products will not be copied to the duplicate categories).
- Make copies of the products and place them in the new categories.
- Categorize the same products in the new categories (i.e., the items are set to be included in the new categories, but are not duplicated).
- Click Duplicate.
- Duplicated category and items will have the word "copy" appended to the original name. You will need to update the name on each of these categories and items.
Note: You should only make a copy if you need additional categories with different content or features.
Control the Order in which your Categories are Displayed
You can control the order in which your categories and subcategories display in the Site Manager, as well as on your website, by using the Display Order field.
- When you add a category, the default Display Order is 0.00.
- Any category with a Display Order of 0.00 will display at the top of the list.
- If there are multiple categories with the same Display Order set, those categories will display in alphabetical order, based on the category name.
- A negative Display Order will place the item above any item with a Display Order of 0.00.
- The Display Order entry can go to 2 decimals. This allows you to place an item between, for example, 1.00 and 2.00, by entering 1.50.
To change the Display Order
- Add a specific number to set the order (e.g., 1.00, 2.00)
- Save Changes
Set a Custom Display Order for Items in a Category
The default display order for items within a category is based on:
- List Order of the item
- Catalog ID/Product SKU of the item
- Product Name of the item
Overriding the Default Display Order of Items in a Category
The default display order for items can be overridden at the category level, by setting the category's Sort By field. This allows you to sort items in the category based on any product field.
- Click directly on a category name to bring up the category edit screen.
- Select a product field from the Sort By menu.
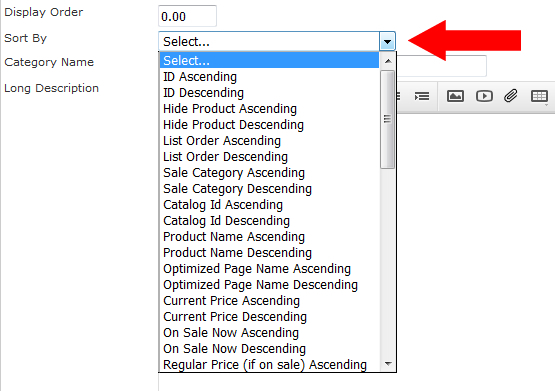
- Save changes.
![]()
Note: If your site does not have the Sort By field available, use the Support Beacon at the bottom-right of your Site Manager to send a us a request to activate that field.
Using Categories for Sales and Seasonal Specials
Along with grouping items into item-type categories (e.g., Shirts or Pond Pumps), you many want to group items that have common attributes, such as all being on sale or all being a seasonal favorite.
- Create your new category.
- Use the "I want to" menu and choose "Categorize Items" to quickly add multiple existing items to the category (see above).

Setting Up a "Virtual Category"
MightyMerchant has some built-in functionality that allows you to create an attribute-based category without the need to add actual items to the category. For example, a virtual category could be set up to display all sale items or all items with a price between $5 and $10.
Contact HEROweb if you are interested in setting up a Virtual Category.