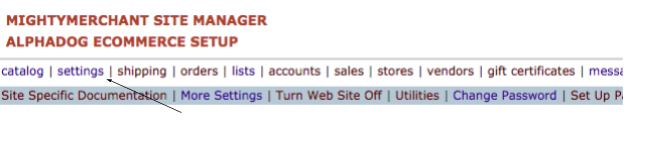
Settings
You can set or change your business name, address, email, phone numbers and many other important pieces of information throughout your site by setting them in the Settings section of your site manager.
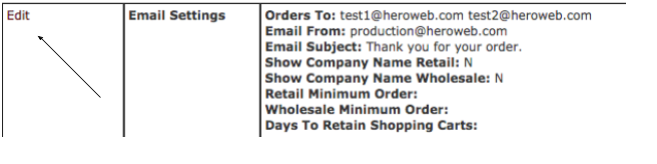
Setting Email Values for Orders
Here is where you can set email values for receiving your order notifications and sending order confirmation notices to your customers:
- Click �Edit� to the left of Email Settings:
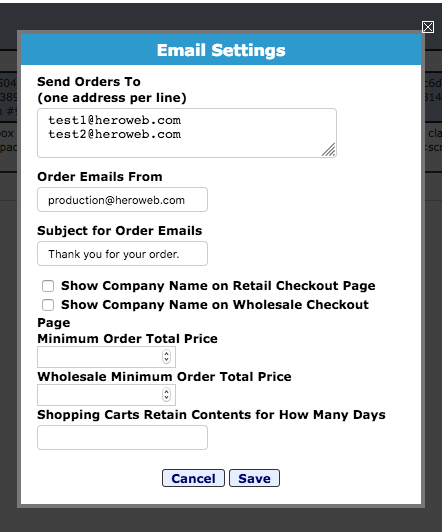
- A window will open that allows you to edit your email settings:
-
You can enter multiple �Send Orders To� email addresses by adding each to a separate line in the box. Each of these email addresses will then receive emails when an order is placed.
-
The email you enter into �Order Emails From� will be the address your customers see when the order confirmation email is sent.
-
The �Subject for Order Emails� will be the message on the subject line of the confirmation emails sent to your customers.
- You can set �Minimum Order Total Price� if you would like to place a minimum order amount for retail orders.
- You can set �Wholesale Minimum Order Total Price� if you would like to place a minimum order amount for wholesale orders
- The 'Days to Retain Shopping Carts' allows you to set the number of days you would like a cart that is started by a customer to persist. By default the cart is kept for 30 days, however this allows you to override that value.
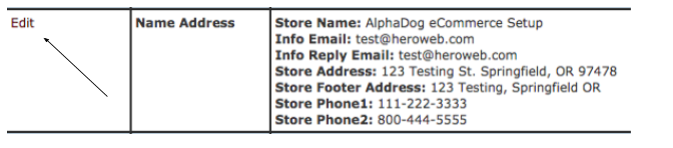
Setting Your Name, Address and Email for General Contact
You can set or change the name, address and phone numbers that appear on your site, and set the email address that will be used for general contact (such as users who submit questions via the Contact Us form) by editing the settings in the Name Address box.
- Click 'Edit' to the left of Name Address:
- A window will open that allows you to edit your contact information:
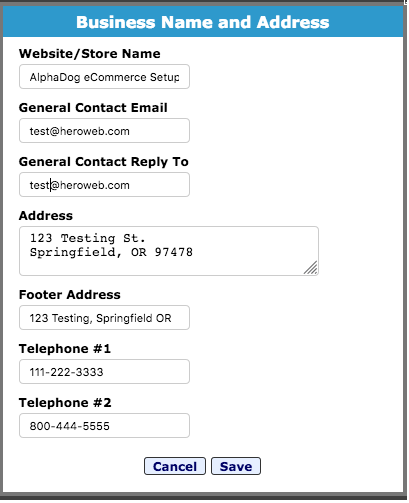
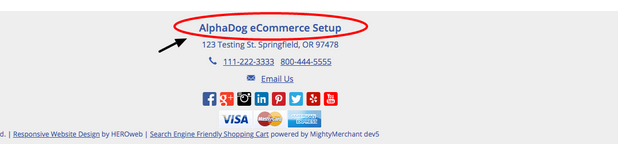
- You can edit the name of your business in the Website/Store Name box. This will appear in multiple places including your Footer, the 'From' line in your emails, and in the title bar of some of your pages.
- The �General Contact Email� will be the email address that is used for the Contact form that comes with every mightymerchant website.
However if you would like to override this for just one particular form, you can do so on the form page in the �Email Submissions To� field box:

- The �General Contact Reply To� will be the email address that your email recipients will see.
- �Address� is your complete address, which will show wherever you would like it to on your website.
- �Footer Address� is the address that will show in the footer (see image above). This provides you with the option to set your complete address for one purpose while setting a different address that will be visible on your website.
- The two telephone boxes provide the opportunity to use up to two telephone numbers on your site. If you would rather not provide telephone numbers you can leave both or one blank.
Using the OptinProvider Tool
If you offer a newsletter through your site, mightymerchant offers a couple of options that you can configure using this setting.
You can read all about how to use each of these in Mailing List Optins support article.
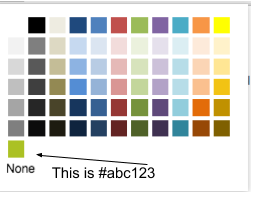
Adding New Color Choices to your Redactor Color Palette
The text editor or �redactor� comes with many colors that you can use to change the color of your text. You can add additional colors by editing this section.
- Click �Edit� to the left of Redactor Color Palette

- A window will open that allows you to add a color.
The 6 character lines appended by a # symbol are called �hex codes. Each hex code represents a unique color. To find the hex code that represents the color you�d like to add, search the internet for �hex code colors�. There are many, many resources available.
Expand the box until you see the last color and then an empty line where you can add your color:
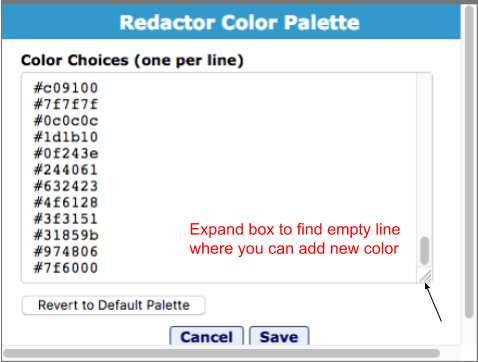
Add the hex code for your new color to this new line and hit the Save button:
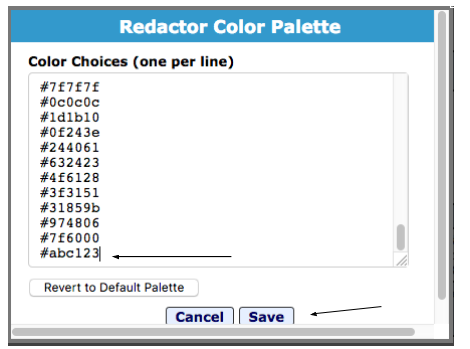
This color is now available to you in your redactor!
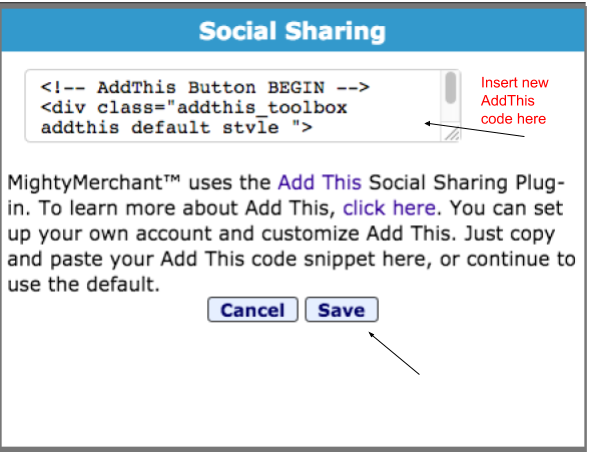
Adding an �AddThis� Social Sharing Plugin to your Site
- Click �Edit� to the left of �Social Sharing�:

- A window will open that explains more about AddThis and provides a link to the AddThis website where you can set-up your account. AddThis will then provide you with a snippet of code that you would add to the box in place of what is currently there, and then hit Save.