

Working with Images
Overview
Preparing your images correctly is an important step in having a successful website.
The key to having your images look good on your site is to be consistent with how you prepare your images. There is no right size for your images to be, but it is important that your images are a consistent size.
The two most common reasons that your images will not work is that they are named incorrectly or the file sizes are too large:
- Avoid spaces and special characters when choosing file names (!@#$%^&*()). Files should also end with a three character suffix (for example: image1.jpg).
- Images should be saved at 72 dpi. Typically, product images would be from 30k-200k. If the file sizes are larger, you should consider reducing the file sizes as you might encounter problems, especially when attempting to load multiple images at once.
- Images with filenames longer than 50 characters will be shortened to 50 alphanumeric characters. To avoid upload conflicts and simplify your image management, we highly recommend that you limit the file name of your images to 50 characters or less. For more tips on naming your images, see below.
File Specifications
Please follow these specifications for best results:
-
1. Either hire a professional photographer or educate yourself in what it involves to take high quality photos. You may also want to consider using stock photography on your website.
Tabletop Studio is a good resource.
2. Icons, logos, and any image with a "transparent" background should be always saved as PNG. Save all photographic images (without any transparent areas) as JPG images. Drawing, text, or images with very few colors can be saved as GIF images.
3. The image names should have no spaces in them and no special characters (!@#$%^&*()). The names should be descriptive of the particular image, and comprised only of letters, numbers, dashes, and underscores, and end in a ".jpg" suffix. For example: "Red_Shirt.jpg", "Red-Shirt-on-Man.jpg", or "Red-Polo-Shirt.jpg" are all good file names.
4. Develop a consistent naming scheme. This will make it much easier for you to manage the site over time. If possible, use your product ID/SKU numbers for your image names, or, the product name.
5. Our software will automatically generate thumbnail (small-sized) images for you. We usually display a small image first and when the user clicks it, they see a large image. Ideally, the images you upload to the site will be about 1024 pixels in height or width, with a resolution of 72 dpi.
6. Consider the background color of the website. It is important that the images work well with the background color so the products look their best.
7. If you are having film developed, get it developed to a photo CD. This will save you from the time and effort involved with scanning your photos.
8. High resolution images are not necessary for the web. We recommend a resolution of 72 dpi.
When you are working with your images, it is best to change the resolution of the image to 72 pixels per inch first before cropping and sizing.
What size should I make my images?
There is no hard and fast rule for sizing your images, but here are some general guidelines.
Bigger is better (up to a point)
Your images should be at least 350px tall by 350px wide. Ideally, they would be larger, about 1024px by 1024px. Any larger than that and you just increase the image load time and bandwidth use.
Zoom Feature
If your site will have a zoom feature, you want to have a large size available for the zoom. We would recommend aiming for images that are 1024 pixels in height or width.
Image Height and Width
Images will display most consistently on your site if they are all the same height and width. However, for sites that sell many types of products that come in lots of shapes and sizes, this may be challenging, because you may have images that are very horizontal and very vertical in orientation.
Here are some tricks to make your image dimensions consistent when you have images of various orientations .
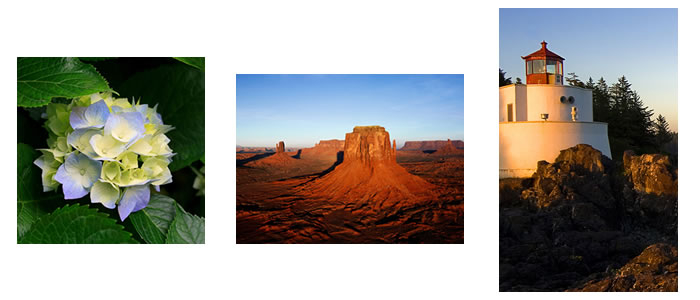
Problem #1: Image dimensions (height, width) are sized to square, horizontal, and vertical dimensions and images have no background.
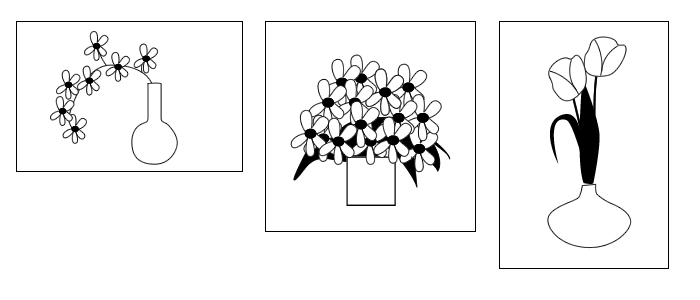
Solution #1: Using an image-editing program, put each image in a square canvas so image dimensions are the same
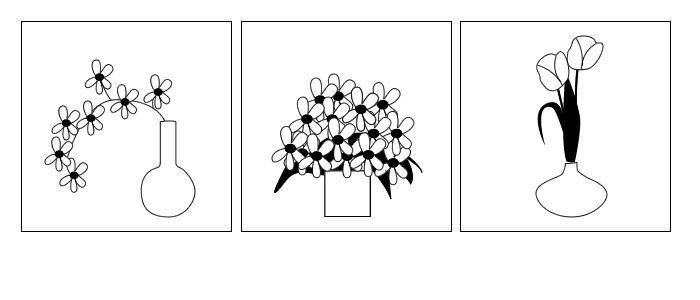
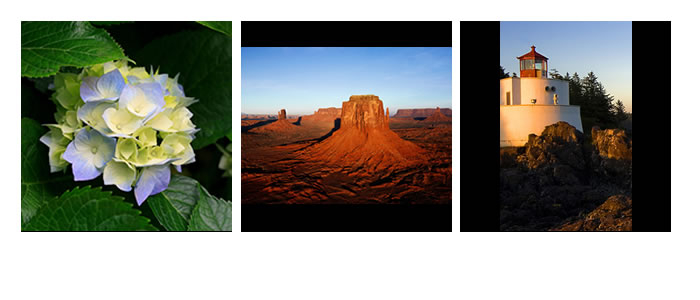
Problem #2: Various image dimensions when images have a background
Solution #2: Using an image-editing program, put each image in a square canvas with a solid background color. This will create a border around the vertical and horizontal images.
Tips for Taking Photos
We have prepared some tips for preparing your images and loading them into the MightyMerchant Site Manager.
If you would like information on taking the photos themselves, we recommend the book " Taking Great Pictures for eBay Auctions and Online Selling" (available on Amazon).
And for a site with more useful information, check out Tabletop Studio -- they have everything you want to know about product photography.
With a decent digital camera and a modest investment in some lighting and staging gear, you should be able to take excellent product photos.
Cropping and Resizing with IrfanView
IrfanView is a free program used for image viewing and simple image manipulation tasks (you can download IrfanView here). Two common tasks that IrfanView is good for are cropping and resizing. You crop an image when you want to isolate one part of it. You resize an image when you want to make it smaller.
(Hint: If you need to both crop and resize an image, it is usually better to crop first. This way, you can see how small your cropped image is before making it even smaller.)
Cropping an Image with IrfanView
You can use IrfanView's crop feature to isolate a particular piece of an image. For example, if you had a product image with too much space around it, you could get rid of this space by cropping.
To crop an image:
1. Open IrfanView.
2. Open the image you want to crop:
-
a. Select File > Open. You should now see the Open window.
b. Find the image you would like to open.
c. To open the image, click the image file name and then click the "Open" button. You can also double-click the file name to open the image.
3. Click on and hold a corner point of the area you want to crop. Then, drag your pointer to the opposite corner of the area and release the mouse button. The cropped image will now be bounded by the selection outline you created in this step.
4. Select Edit > Crop selection. The image will now be cropped.
5. Now that you have cropped your image, you will want to save it. You can either save over your original image or create a new image.
(Hint: If you are making several modifications to your image, save often to avoid losing your work.)
-
a. To save over your original image: Select File > Save (original folder).
b. To save as a new image: Select File > Save as... In the "Save Picture As..." window that pops up, navigate to the folder where you want to save the image. Enter the name of the new image and click the "Save" button.
If your image is very large, you may want to resize it (see below).
Resizing an Image with IrfanView
You can use IrfanView's resize/resample feature to make an image smaller.
To resize an image:
1. Open IrfanView.
2. Open the image you want to resize:
-
a. Select File > Open. You should now see the Open window.
b. Find the image you would like to open.
c. To open the image, click the image file name and then click the "Open" button. You can also double-click the file name to open the image.
3. Select Image > Resize/Resample... You should now see the Resize/Resample image window.
4. There are two main ways to resize your image:
-
a. Set new size: Select the radio button to the left of "Set new size" (selected by default) and enter the new values. Using this method, you can type in the number of pixels/centimeters/inches for the width or height of the image. By default, if you change one dimension, InfranView will automatically resize the other dimension proportionately. To override this default, uncheck the "Preserve aspect ratio (proportional)" checkbox at the lower left of the window. Pixels are the standard unit of computer graphics. If the image is a product image and will be displayed on your website, resizing to around 1000 pixels by 1000 pixels (or at least 600 pixels by 600 pixels) is usually a good guideline.
b. Set new size as a percentage of original: Select the radio button to the left of "Set new size as a percentage of original" and enter the percentage of the original width or height you want the resized image to be. By default, if you change one dimension, InfranView will automatically resize the other dimension proportionately. To override this default, uncheck the "Preserve aspect ratio (proportional)" checkbox at the lower left of the window.
Once you have entered the new values, click the "OK" button.
5. Now that you have resized your image, you will want to save it. You can either save over your original image or create a new image.
(Hint: If you are making several modifications to your image, save often to avoid losing your work.)
-
a. To save over your original image: Select File > Save (original folder).
b. To save as a new image: Select File > Save as... In the "Save Picture As..." window that pops up, navigate to the folder where you want to save the image. Enter the name of the new image and click the "Save" button.
Your image is now resampled and ready to be loaded onto your website.
Converting Other Graphic Files to .jpg Files
Converting non-PDF graphics files
For converting most graphic files (.bmp, .tif, etc.) to .jpg, you can simply open the file in Irfanview, then File > Save As a .jpg file.
Converting PDF files
To convert PDF files, open the PDF file using your PDF reader (such as Adobe Acrobat Reader) and take a screenshot.
Open Irfanview and click Edit > Paste.
Crop, if necessary, using the instructions above, then save the file as a jpg.
Scaling and Sizing Images with Graphic Converter (Mac OS X)
- Start by making sure you image is saved to your hard drive and is named so you can easily find it in the next steps.
- Open Graphic Converter.
- Open the image you saved in step 1.
- Go to the Picture menu -> Resolution.
- Set the resolution to 72 dpi x 72 dpi.
- Go to Picture menu -> Size -> Scale.
There is not one correct size to scale your image to. It is better
to leave your image larger rather than smaller.
- Select File menu -> Save As...
- Select a new name for your image so you don't overwrite the original.
- The Save dialog box will appear.
- Select .jpg and choose a quality level of "90".
- Save your image and you are done.
Sizing Images for Specific Dimensions
If you have a section on your website that requires that you pre-size images prior to loading them in the Site Manager (e.g., for a slideshow), here are some instructions for sizing and cropping the images.
1. Open a copy of the image in your image editing program.
2. There should be way to check the images size and canvas size. Usually it's under an "Image" tab. You may or may not be able to access the image size and canvas size from the same window, depending on your image-editing program.
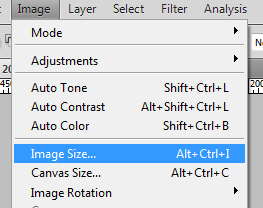
3. If there is an option to constrain proportions when making sizing adjustment, be sure this option is checked.

4. Put in the width that you want in the width field. The height should change automatically. DO NOT SAVE YET.
5. Evaluate the height.
If the resulting height is more than what you need, go ahead and click okay, then proceed to the next step.
If the resulting height is less than what you need, enter the height you need in the height field (the width will now be more than you need), then click okay and proceed to the next step.
6. Adjust the canvas size.
You will not want to constrain proportions on this step as you only want one dimension to change.
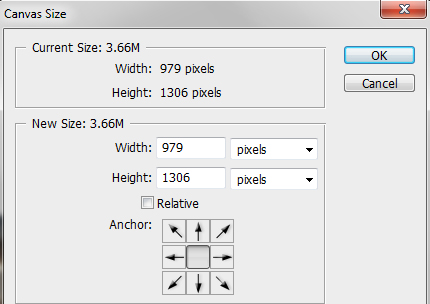
If your image is taller than you need, set the anchor to the top, center, or bottom. This is where you want the image to be adjusted from. Then, adjust the canvas size to the correct height.
If your image is wider than you need, set the anchor to the left, center, or right - this is where you want the image to be adjusted from -adjust the canvas size to the correct width.
7. Save your image with a name different than the original image.
Note: If you can't find the image size or canvas size options in your image-editing programs, try checking the help documentation for the program.
Creating Images to a Specific Size with Pixlr
Pixlr is a free online image editor you can use to size and crop images. Here are some instructions for using Pixlr to create images to specific dimension.
1. Access the Pixlr online editor
- Go to http://www.pixlr.com
- Scroll down and click the button inside the "Pixlr Editor" box titled "Launch Web App"
- Click "Create a new image"
- Set the dimensions for the new image and click "OK". This will create a blank canvas.
2. Choose Layer > Open image as layer
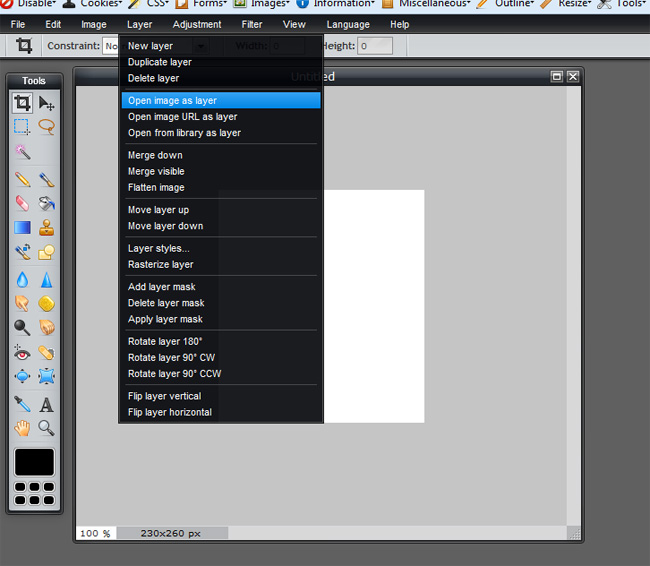
This will bring up your computer's directory. Navigate to the image you want, then double-click on the image. This will place the image on the canvas.
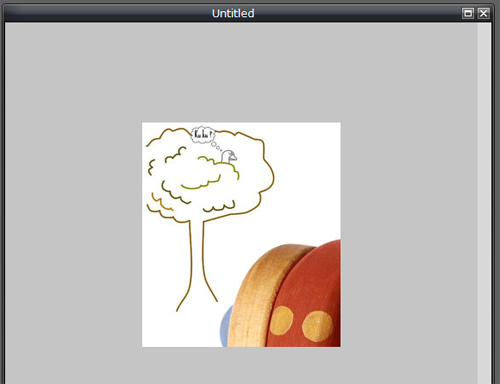
3. Next you will resize and reposition the image
Choose Edit > Free transform...
![]()
Click within the box that displays and hold down the left mouse button to move the image around until you have centered it over the canvas.
![]()
![]()
Hover over one of the corners (see red arrow) and the cursor display will change. Hold the "Shift" key on your keyboard while you click and drag the corner to adjust the size of the image. (Don't size the image smaller than the canvas.)
![]()
Resize and reposition the image until it looks how you want.
4. Choose File > Save and save the image under a new file name
Getting the Right Tools
If you are going to be putting images on your site on a regular basis, you will want to use an image editing program. There are many free ones available for basic editing, or you can invest in a modestly priced program for additional features.
A great program that runs on the Macintosh is:
- Graphic Converter: This program will allow you to do all basic image cropping and scaling.
Some of programs available for Windows are:
- IrfanView: This is a very basic image editing program that can be used to view and resize images. It's a free download.
- Photoshop Elements: Reasonably-priced image-editing program with text and drawing capabilities. A good option.
- Pixlr: Free online photo editor (with no registration) letting you edit, adjust, and filter your images.
- Picasa: Image organizer and viewer with basic editing capabilities for free. Automatically stores all screenshots ("Print Screen"), making them easily accessible and editable.
The tasks you will need to do should be quite basic, so you will probably not need a high end program (i.e. Photoshop).
Loading Your Images onto the Site
You may add, edit, and/or remove images on your categories as well as your items.
For information on how to manage your categories: manage-categories
For information on how to manage your products/items: manage-items
To load an image onto the site:
-
1. Go to the Product or Category page on which you want to load the image.
2. Click the "Choose File" button.
3. Select the image from your hard drive. Check to make sure it is named correctly.
4. Click "Save Changes".
Depending on the size of the images you are uploading and the speed of your connection, the image upload can take anywhere from a few seconds to a minute. If you are adding multiple photos at once, and they are all large file sizes, the upload can take several minutes.
Please be patient and do not click the "Save Changes" again until the image upload is complete. You will know the image upload is complete when the list of products or categories is displayed on the screen.
5. Once you have loaded a few images, preview them on the site to see how they look.
If you are having trouble, contact our support staff and we will be happy to help you.
To remove an image in Edit view:
-
1. From the product "Edit" view, click "clear image".
To remove an image in List view:
-
1. From the product "View List" page, click "clear image".
To rotate an image in List view:
-
1. If you accidentally load an image that is sideways, you can rotate the image from the product "View List" page by clicking "rotate image."
To rotate an image in Edit view:
-
1. If you accidentally load an image that is sideways, you can rotate the image from the product "Edit" view page by clicking "rotate image."
Adding Additional Photos in Blocks of Text
Using the HTML Editor to add images
For complete instructions on how to use the text editor in your site manager, click here!.
To add extra or multiple images to a block of text:
- Place your cursor where you want your image to be located, then click the
"Insert Image" icon (pointed mountains to the left of the "play" button
for inserting video).
- Insert your image by either
uploading (dragging and dropping the file to the "Drop file here" box,
or clicking "Browse..." and locating the file on your computer), or by
linking (click the "Link" button", enter the URL for your image, and
click "Insert").
- Resize your image by clicking it, and while holding down the mouse button, drag the mouse to shrink or enlarge it.
- To delete the image, click it once, and choose "Delete" from the "Insert Image" box that pops up.
- Once finished, click "Save" on the page you are editing, and then "Save Changes" on the next page you are taken to.
Editing Images Once You Have Added Them
- After you have added your image, click on it. A black box should appear over the image with the words "Edit."
- Click on the "Edit" box.
- You should now be able to insert a title or link for the image in the fields provided. If you add a link, and you would like it to open in a new tab, check the box next to "Open link in new tab."
- You can also adjust whether the image appears on the right or left of the block of text using the pull-down menu under "Position" and selecting "right" or "left."
Converting Non-Graphic Files to Graphics
Here is a "cheaty" way to create a graphic image out of a file that isn't a graphic.
1. Open the file with whatever program will open it.
2. Adjust the size so you can see the entire part of the page that you want to include in the image.
For example, if the file is a PDF, change the percentage down until you can see the entire page.
3. Push the "Print Screen" button on your keyboard. It's usually somewhere near the top-right. It will seem like nothing happened, but it actually copies an image of what you're seeing on the screen onto the computer's "clipboard".
4. Open an image editing program like Photoshop or IrfanView, and create a new file.
5. Paste the image (Ctrl + P) or right-click and choose "Paste".
6. Crop the image and save as a .jpg.
Converting Non-Web Graphic Files to Web Graphics
If you have a file that IS a graphic, like a .tif or .bmp, you can open these in most image-editing programs, then save as a .jpg.
Some image-editing programs, like Photoshop will also open .eps files.
Tips for Naming Image Files
Below are a list of recommendations that you should follow when working with images and the MightyMerchant Site Manager:
1. You should always use unique file names if you are going to use the same image in different image fields.
For instance, if you are using the same image for a category image and a product image, you should save a copy of the original image and name it differently for both the category image file name and the product image file name.
Note: If you change the size of the original image in the process of renaming the file, make sure to not copy over the original file with the resized image.
Example:
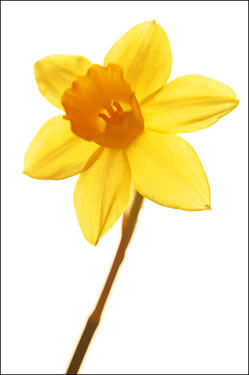
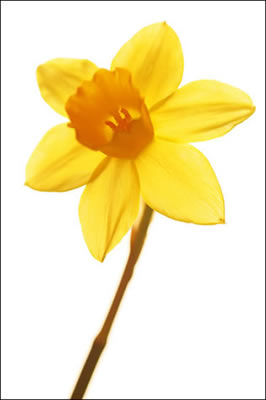
cat_myimage.jpg for the category image and myimage.jpg for the product image.

|
|
|
|
daffodil.jpg |
cat_daffodil.jpg |
lg_daffodil.jpg |
|
Image 1 (main product image) |
Picture (category image) |
Image3 (click to enlarge image) |
The reason you want to do this is that often the category image dimensions are set to be different than the product image dimensions and a file name of the same exact name will overwrite the previous file upload at perhaps a different image dimension. This will cause the image to display on both pages at the same size and possibly affect the layout of your website.
2. You should not to use the same file name for two different images.
Example:

pink.jpg |
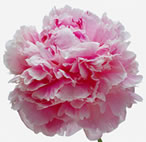
pink.jpg |
|
rename to "pink_rose.jpg" prior to upload |
rename to "pink_carnation.jpg" prior to upload |
A rose image named �pink.jpg� and a carnation image named �pink.jpg� are obviously not the same image. If you upload the rose image first and then upload the carnation image second, the carnation image will display in both places as it will have overwrote the previous uploaded file.
3. Do not have �home� included as part of the file name.
Ex: home_image.jpg.
4. File names are case-sensitive.
The web server sees �imagename.jpg� and �IMAGENAME.JPG� as two different files.
5. Do not make your file names overly long.
If the file name exceeds the maximum characters, then the name will be truncated, will likely lose the file extension, and thereby will not display on the website.
Example:
Use �royal_william_rose.jpg� instead of �dark_red_hybrid_tea_rose_royal_william.jpg�
6. Do not include symbols or characters in your file names.
Symbols to avoid are ampersands, parenthesis, commas, apostrophes, periods, pound signs, asterisks, and dollar signs, just to name a few.
The names should be comprised only of letters, numbers, dashes, and underscores, and end in a ".jpg" or �.gif� extension.
Example:
Use �pink_and_white_roses.jpg� instead of �pink & white roses.jpg�
7. If you are naming a file and intend to use multiple words in the file name it is �best practice� to separate the words by using an underscore.
Example:
Use �pink_rose.jpg� instead of �pink rose.jpg�