

Blog Component: Managing Your MightyMerchant Blog
A MightyMerchant Blog offers you an easy-to-edit blogging capability that is tightly integrated with your website. If you want a full-featured, WordPress blog, contact us for more information.
Setting Up a Blog with Subcategories
Top-Level Blog Category
The top-level Blog category should have these settings (click directly on the category name to edit):
- List Action: Set this to "cpage"
- Section ID: Set this to your main blog category
- Sidebar Text Under About: Add a brief description about your company. This displays in the sidebar throughout the blog pages on your site.
Add Subcategories
Since a blog will normally have many posts, you will want to add a subcategory for each topic. This will help keep your blog organized, and will help your site visitors easily find information in which they are interested.
Examples of topic subcategories:
- General Interest
- Finding the Right Pet
- Backyard Decorating
Creating a Blog Post
Each blog post should be added as an item to the main Blog category, then set to also be included in one or more Blog subcategories.
- Use the "I want to" drop-down menu to the right of the Blog category and choose "Add an Item".
- Enter your content for the various fields.
- At the top-right of the edit screen, click to edit categories for the item, then check off the appropriate subcategories under Blog (you do not need to check the main Blog category).
- Save.
How the Blog is Displayed
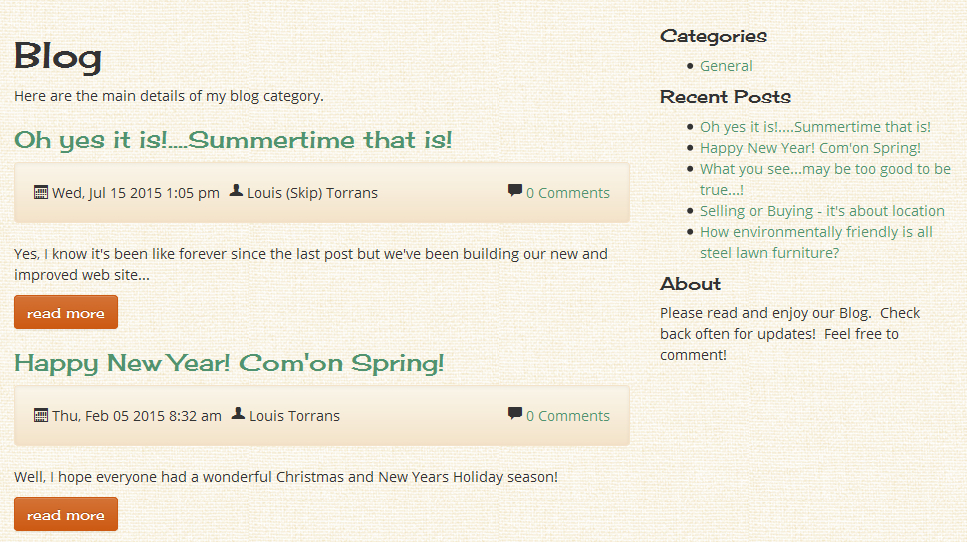
- On the main blog page, the five most recent posts will display.
- If you click on a subcategory, only items in that category will display.
- The sidebar throughout the blog pages includes links to the Blog subcategories, your most recent blog posts, and the Sidebar Text Under About content from the main Blog category.
Setting Up a Blog with No Subcategories
If your blog only has a few posts, you may not need to add subcategories.
Top-Level Blog Category
The top-level Blog category should have these settings (click directly on the category name to edit):
- List Action: Set this to "cpage"
- Section ID: You do not need to set this
- Sidebar Text Under About: Add a brief description about your company. This displays in the sidebar throughout the blog pages on your site.
Creating a Blog Post
Each blog post should be added as an item to the main Blog category, then set to also be included in one or more Blog subcategories.
- Use the "I want to" drop-down menu to the right of the Blog category and choose "Add an Item".
- Enter your content for the various fields.
- Save.
How the Blog is Displayed
- On the main blog page, the five most recent posts will display.
- The sidebar throughout the blog pages includes links to the your most recent blog posts, a View All link, and the Sidebar Text Under About content from the main Blog category.
Tips for Blog Posts
- Add plentiful links from your blog posts to specific products on your site. Cross-linking between your blog and your products is a key step for generating orders and building a site with a strong search engine profile (see Using the MightyMerchant Text Editor).
- Use the start time and end time fields for timed release of blog posts.

Managing Disqus Comments
Typically when we set up a mini-blog on your MightyMerchant site, we integrate the Disqus comment system, which is a widely deployed and currently free web commenting and sharing system (see How to Sign Up for Disqus).
With the typical configuration, you will receive an email after any comment is posted on your site.
To moderate comments:
- Reply to the message from Disqus. Don't change anything in the email.
- Insert one of these words at the very top of the email text: "Delete", "Approve", or "Spam".
You can also log into the moderator panel at www.disqus.com to moderate your blog comments.